
/ Ref / HzPlugins
Hz.Plugins . 3rd Party Plugins
General MIDI . MIDI CC . MIDI notes
Configure
home . Topics . Interface . Reference . Examples
flag
Hz.Pluginsare included withHzWeb. They are built atop the Web Audio Module (WAM) standard and can theoretically be loaded into any WAM host, TOC hereThat said, our focus is providing the necessary batteries required to use HzWeb so we offer no guarantees of their functionality in other WAM hosts.
Hzships with many examples discussed here.right-click for table of contents
Instruments
Hz.FM7
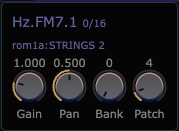
Hz.FM7 s a great utility synth that can produce a wide variety of
high-quality synthesized sounds from a collection of hundreds of
presets. If you want more control over your sounds we suggest
stepping up to Hz.FM8.
Hz.FM7 is a polyphonic 6-operator FM synthesizer based on Google's
music synthesizer for android (msfa) which itself is based
on the Yamaha DX7. We've added support for 33 built-in banks
of 32 patches from a variety of public domain patch sets. We've also
extended it to support stereo out and more voices. Note
that this is the same foundation used by Dexed and a variety
of other online sythesizers.
To instantiate with preset bank and patch:
let fm7 = await ascene.NewAnode("Hz.FM7", {
  name: "myfm7",
  preset: {
    Bank: 3,
    Patch: 5,
    Gain: 2.3
  }
});
Hz.FM8
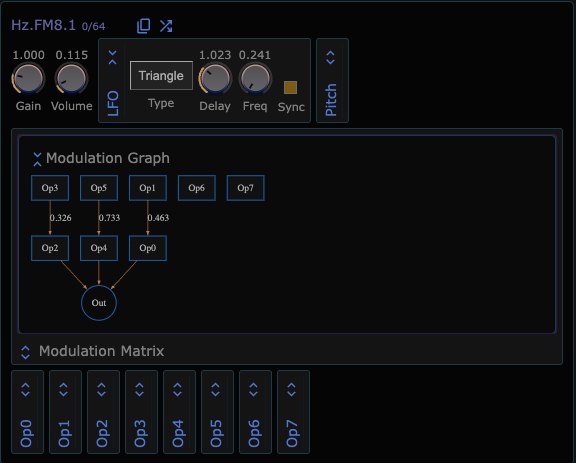
Hz.FM8 is a fully configurable 8-operator FM synth. Use it instead of FM7
to achieve more control over your sounds. You can select from
a collection of presets or you can craft your own. When creating or tuning
a sound, it can be helpful to audition parameter tweaks with
examples/hzplugins/fm8midi.js and a MIDI keyboard.
unfold_more Press the expand/contract
button to expose parameters with a subpanel. You can also click on
an operator within the Modulation Graph to exclusively show
parameters for the selection.
content_copy Press the copy button to
copy the current parameter state to the clipboard. Once there, paste it
into code editor and stash it in your workspace for future use.
shuffle Press the shuffle button to
produce novel settings. Make sure to save important state
(via copy-to-clipboard) prior to pressing this.
See here to learn more about the Modulation Matrix and the
per-operator parameters.
To instantiate FM8 with a single voice preset file:
let inst = await scene.NewAnode("Hz.FM8");
let presetPath = path.join(this.GetCWD(), `fm8/voices/${preset}`);
let presetObj = await globalThis.FetchWSFile(presetPath, "json");
await inst.LoadPreset(presetObj);
To instantiate FM8 with a randomized configuration:
let inst = await scene.NewAnode("Hz.FM8");
await inst.LoadPreset("shuffle"); // also e.g. "shuffle:Bass"
Examples here: .../hzplugins/fm8bank.js, fm8.js, fm8midi.js.
Hz.Samplo
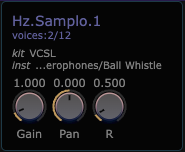
Hz.Samplo is a polyphonic sample-playing instrument. You can initialize
it from a variety of online sample-sets.
Hz.Samplo ships capable of producing literally hundreds of different sounds.
You can also initialize it with your own samples.
Sample-sets come in two categories:
tonal- samples represent notes on an instrument.sound/percussion- samples represent arbitrary sounds that don't map to musical notes.
Hz.Samplo handles both types but your scripts must be aware of this
distinction because it affects the interpretation of MIDI key numbers.
Be aware that some percussion banks organize their sounds based on the
GeneralMIDI standard.
Here is an example instantiation:
let samplo = await scene.NewAnode("Hz.Samplo", {
  preset: {
    A: 0.1, // soundfonts have a natural attack env.
    D: 0.01,
    S: 1,
    R: 1.5, // user releases prior to end of sbuf.
    Gain: 2,
    instrument: {
      kit: "FatBoy",
      inst: "church_organ"
    }
  }
});
Hz.Osc
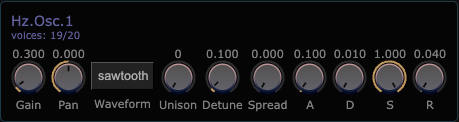
Hz.Osc is a simple polyphonic instrument based on WebAudio's oscillator node.
It has support for Unison voices which is achieved by assigning
multiple (detuned) oscillators to a single note. Hz.Osc implements
a custom note expression, _frequency, that can be useful to
programmatically control an oscillator frequency while a note is held.
This can be thought of as a more general note expression than tuning.
Here is an example instantiation:
let inst = await Anode.New("Hz.Osc", {
  preset: {
    Waveform: 1,
    Gain: .5,
    A: .1,
    D: .01,
    S: 1,
    R: .04,
  }});
Hz.Genish
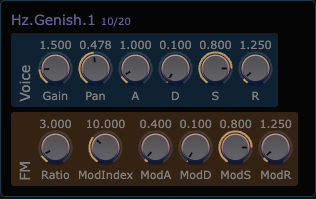
Hz.Genish is a programmable audio processor based on
genish.js which, in turn,
was inspired by gen~ for Max.
The cool thing about genish is that it allows you to develop custom
synths or effects without all the fuss required to produce a full plugin.
Your genish extension/customization is a small JavaScript-let like this:
// a simple FM synth (that plays a single tone)
function FM(g) // g is the genish context with dsp operators.
{
  let sineOsc = g.cycle(g.madd(10, g.cycle(4), 440));
  return g.mul(sineOsc, .25);
},
To construct:
let mode = "stereo"; // or "mono"
let type = "instrument"; // or "effect"
let genish = await scene.NewAnode("Hz.Genish", {
                              acfg: {mode, type}
                            });
await genish.LoadPreset({genish: {
    name: "coolsynth",
    code: yourFunction.toString(),
    wsdir: this.GetCWD()
  }};
Examples here: hzplugins/genishTestSynth.j,genishTestEfects.js,genishFM2.js and
genish scriptlets below hzplugins/genish/.
Hz.Genish operators and implementation details are here.
Hz.Guitar
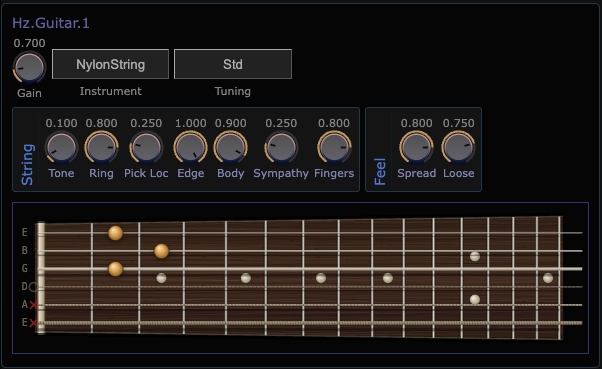
Hz.Guitar implements a string-synthesis algorithm based
on the open-source package Fretwork.
In the context of Hz plugins we separated out Fretwork's effects chain
into Hz.Effects. We've converted its guitar
synthesis engine to C++ to produce a high-performance WASM. The two
make an excellent pair and suggest that you bring Hz.Effects
to all Hz.Guitar gigs.
info One distinguishing trait of a guitar relative to keyboard instruments: a guitar has multiple (usually six) strings that support multiple string+fret combinations to produce an individual MIDI note. Part of the compositional task is to select where on the neck a MIDI note should be played.
When Hz.Guitar receives standard Note events, it automatically assigns
that note to a string+fret combination. You can explicitly request
string+fret assignments for notes as well as invoke special Guitar
features using the Sandbox EventHub.
EventHub.Emit("Hz.Guitar", guitarId, ...request... )
Note that to support multiple Hz.Guitar instances we require a
guitarId to identify the target anode for the request. This is
is readily available thus:
let inst = await scene.NewAnode("Hz.Guitar");
let guitarId = inst.GetId();
Here are the messages that Hz.Guitar understands.
| Request | Description |
|---|---|
"pluck", start, string, fret, vel, slide?, bend?, harmonic? |
Pluck a single string + fret. Optional parameters are positional. Value of null indicates unspecified. |
"strum", start, chord, vel, dir |
Pluck notes from the named or explicit chord. dir:-1,1 (up, down) |
"chuck", start, chord, vel |
Strum with muted strings. |
"handmove", start, fromfrets, tofrets, gain |
Hand motion from one chord to another can produces squeaks. |
"bend", start, string, bendCents |
Frequency bend measured in semitone cents. Set string to -1 to bend all strings. |
"vib", start, string, depth, rate |
String vibrato, depth is semitone cents, rate is Hz. Set string to -1 to apply to all strings. |
"mute", start, string, decay |
Deaden a string, decay:1 is instant. Set string to -1 to mute all strings. |
To instantiate Hz.Guitar with preset values:
let inst = await scene.NewAnode("Hz.Guitar", {
  preset: {
   Gain: .7,
   Instrument: 1,
   Tuning: 0,
   StringTone: .1,
   StringRing: .8,
   StringPick: .25,
   StringEdge: 1,
   StringBody: .9,
   StringSympathy: .25,
   StringNoise: .8, // Fingers
   FeelSpread: .8,
   FeelHuman: .75, // Loose
  }
});
Hz.Noise
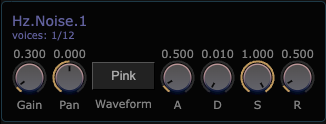
Hz.Noise is a simple synth that produces your choice from three
colors of noise.
Effects
Hz.Biquad
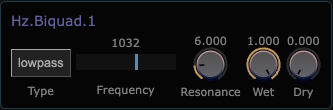
Hz.Biquad is a thin vaneer around WebAudio's
BiquadFilter node.
It provides several filter types including: "lowpass", "bandpass", and "highpass".
Hz.Filter may also be used. It implements the XVF algorithm
and offers built-in LFO support.
To construct:
// filtertype:
// 0: lowpass, 1: highpass, 2: bandpass, 3:lowshelf
// 4: highshelf, 5: peaking, 6: notch, 7: allpass
let filt = await state.ascene.NewAnode("Hz.Biquad", {
      preset: {
        Type: 2,
        Resonance: 24,
      }});
Hz.ConvVerb
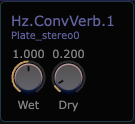
Hz.ConvVerb is a simple but powerful reverb built atop WebAudio's convolver.
Hz.ConvVerb implements a filter that applies an impulse-reponse audio file
to the incoming signal. You can use an arbitrary audio sample file (typically
length-constrained) for interesting effects. There are also many online
sources for impulse-response files captured by a range of cheap-to-expensive
tecniques. Make sure to heed their licensing terms!
Here's a snippet from our example: hzplugins/convverb.js.
let rev = await scene.NewAnode("Hz.ConvVerb");
await rev.LoadPreset({Wet: 1, Dry: .2});
// samples CC-BY-SA (C) 2016 Damo
let root = "https://raw.githubusercontent.com/zamaudio/impulses/master";
let ir = `${root}/Hall_mono0.wav`;
await rev.LoadPreset({impulseResponse: ir});
Hz.DynaCompress
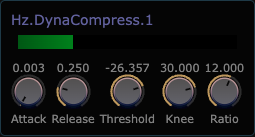
Hz.DynaCompress is a simple wrapper of WebAudio's
DynamicsCompressorNode.
Hz.DynaCompress provides a compression effect, which lowers the volume of
the loudest parts of a signal. Compression can help prevent clipping and
distortion when multiple sounds are combined, and it is also used in music
production and game audio for dynamic control, tone shaping, and other
creative effects.
Example here: hzplugins/dynacompress.js.
If you need more compression or expansion control, see Hz.SpectreCompress.
Hz.Echo
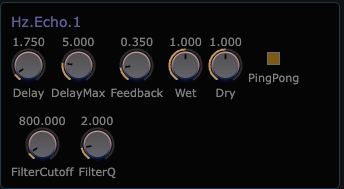
Hz.Echo is a simple feedback-delay effect with support for PingPong
echo. Included in the feedback path is a lowpass filter. The lower
the FilterCutoff the darker the echo-return.
Hz.Effects
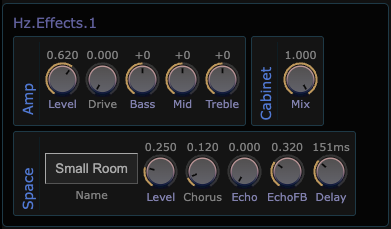
Hz.Effects is a simple multi-effects node that works well with
Hz.Guitar and other instruments. It includes
a room reverb, amplifier controls, chorus and echo and a cabinet
simulator. Details of the effects graph can be seen
here.
Hz.Filter
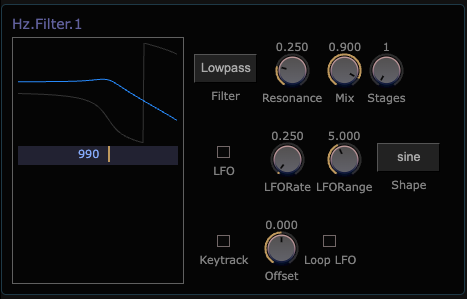
Hz.Filter implements a SVF algorithm and provides lowpass, highpass,
bandpass and notch filter options. It also supports resonant frequency
modulation via a built-in LFO. When Keytrack is enabled the
resonant frequency follows the MIDI key events that you provide it.
Hz.Freeverb
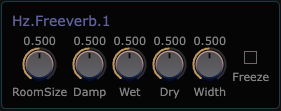
Hz.Freeverb is a port of the well-known, public-domain Freeverb effect
written by Jezar at Dreampoint, June 2000. Its Freeze parameter
can be employed to add reverb glitch. This alternative to Hz.ConvVerb
supports continuous variation of room-size, etc.
Hz.Genish Effect
Hz.Genish (above) can also be used to describe custom effects.
Using Hz.Genish as an effect processor requires a couple steps.
First, instantiate the node:
let genish = await scene.NewAnode("Hz.Genish", {
                acfg:{type:"effect"}
              });
Next, wire an input that produces a sound to be processed, something like:
ascene.Chain(audiosrc, genish, dac);
Next, make sure that your genish scriptlet refers to in1 and/or in2.
These represent your node's left and right input channels. Here's a
simple mono crusher distortion:
function ampcrush(g, ampScale=12)
{
  return g.div(g.round(g.mul(g.in1, ampScale)), ampScale);
},
Finally, load your scriptlet.
await genish.LoadPreset({
  genish: {
    name: "cooleffect",
    code: ampcrush.asString(),
    wsdir: this.GetCWD()
  }
})
More examples here: hzplugins/genishTestEfects.js and
genish scriptlets below hzplugins/genish/;
Hz.GrainFilter
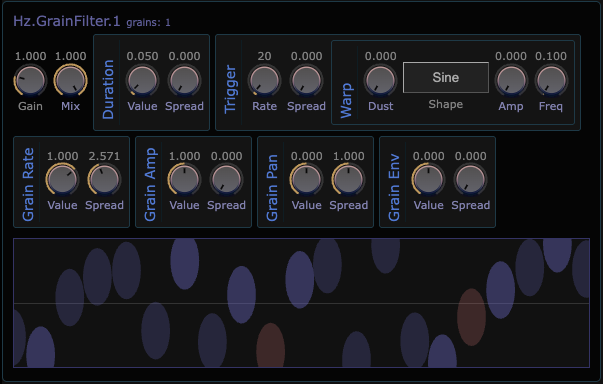
The diagram above shows recent grains where y-axis is stereo position, width is duration, height is amplitude, color and opacity portray rate and age with newest grains on the right.
Following are actual parameter names that you can set by script. Where the relationship between GUI labels and parameter names is unclear we provide a clue.
| Parameter | Range | Description |
|---|---|---|
Gain |
[0,4] | Linear output gain. |
Mix |
[0,1] | Mix input and filtered signal. |
Dur |
[0,1] | Durations in seconds of a grain. |
dDur |
[0,1] | Duration variation as a pct around value. |
TriggerRate |
[0,500] | Grains emitted per second. |
dTriggerRate |
[0,1] | Variability in trigger rate. Spreads as pct of rate. |
dP (Warp Dust) |
[0,1] | Variability in grain position. Spreads as value around current rate and expressed in pct of total buffer. |
ScanLFOShape |
0,1,2,3,4 | Warp shape for LFO dust. Only active when Amp and Freq are non-zero. |
ScanLFO |
[0,1] | LFO warp Amp. |
ScanLFOFreq |
[0,20] | LFO warp Frequency in Hz. |
Rate |
[-3,3] | Grain playback rate. 1 is the natural rate, -1 is reversed. |
dRate |
[0,6] | Variability in playback rate. Spreads as additive rate around value. |
Amp |
[0,2] | Grain amplitude. |
dAmp |
[0] | Variability in amplitude. Spreads as pct around value. |
Pan |
[-1,1] | Grain pan position. -1:left, 0:center, 1:right. |
dPan |
[0,2] | Variability in pan. Spreads as addtive pan around value. |
WindowSkew (Grain Envelope) |
[-1,1] | Grain window/envelope shaping. -1 is maximum attack speed, 1 maxes release speed. |
dWindowSkew |
[0,1] | WindowSkew variability. |
Examples here: hzplugins/grainfilter.js.
Hz.LFO
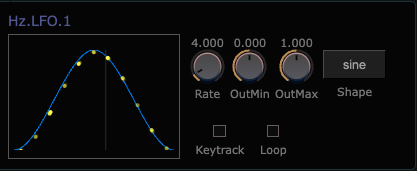
Hz.LFO is a simple envelope-based Low Frequency Oscillator.
You can design your custom envelopes with
envelope editor and paste
them into your script or the GUI.
For examples see: hzplugins/lfo.js,lfoModulator.js.
// To initialize `Hz.LFO` with a custom envelope:
let lfo = await scene.NewAnode("Hz.LFO", {preset: {
  envelope: {
      shape: "tooth",
      smooth: false,
      data: [0, 0, 5, 0.5, 1, -5, 1, 0, 0]
    },
  }
});
Run Modes
Hz.LFO supports two run modes and this determines how they
should be connected into the audio graph.
// To use `Hz.LFO` as an `amplitude modulator`:
let lfo = await scene.NewAnode("Hz.LFO"); // RunMode:0 is default
scene.Chain(inst, lfo, dac); // inst and dac created elsewhere

// To use `Hz.LFO` as a `parameter modulator`:
let lfo = await scene.NewAnode("Hz.LFO", {preset: {RunMode:1}});
scene.ModulateParam(lfo, inst, "Pan"); // inst created elsewhere
flag Important notes for parameter modulation
- only some anodes have parameters that support parameter modulation.
- make sure that the LFO
OutMinandOutMaxparameters produce a signal range appropriate for the parameter.
Hz.StretchSS
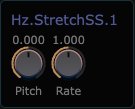
Hz.StretchSS is a pitch-shifter with conditional time-stretching
capabilities. It's based on SignalSmith Stretch
by Geraint Luff. The algorithm is computationally fairly intensive
and this means that you probably can't build scenes with a lot of
StretchSS nodes.
When it comes to pitch-shifting, it's generally true that shifts beyond a few semitones tend toward a cartoonish sound. Use responsibly.
When it comes to time-stretching of a live signal, there are extra caveats/considerations and these depend on whether you need to slow down or speed up the performance.
Generally, time-stretching is best performed offline. SndEditor uses the same SignalSmith tech to produce the stretched or squeezed result on an entire .wav file.
That said, a certain amount of time-stretching can be done live.
In both stretch and squeeze cases we implement a buffering scheme
and the size of the buffers impacts how long the stretch affect
can be sustained before dropouts occur.
In the case of slowing down (stretching) the signal, a logjam occurs on the input signal and when the input buffer fills we drop input packets.
In the case of speeding up (squeezing) the signal the output is starved. To resolve this we enter input buffering mode during which time you'll hear silence.
Hz.Spectre
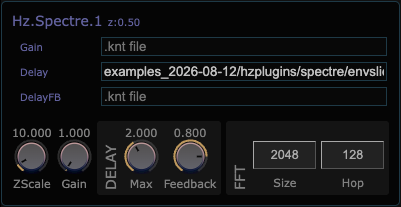
Hz.Spectre performs spectral processing on its input signal.
This translates to controlling an effect in frequency-space where
you specify a different effect-amount at each frequency in the signal.
The idea is that the envelope files authored in Envelope Editor
are a compact and convenient tool to describe a time-varying spectral
weighting function. Hz.Spectre supports such envelopes to modify the input
signal in the spectral plane (spooky).
From 1-3 planes can be provided (during init or by drag-drop) to affect the spectral processing:
Gain- to sculpt the per-frequency-band amplitude.Delay- to sculpt the per-frequency-band delay.DelayFB- to sculpt the delay feeback about at each frequency band.
Since envelopes are canonically 0-1 in all axes, we support these scale parameters:
ZScale- if your envelope is deep, the ZScale affects how quicklyHz.Spectremoves through the envelope's z-axis. If you have a single z-plane in your envelope, this parameter has no effect but if you do a value of 10 means that it will repeat the envelope after 10 seconds.Gain- scales theGain Envelope, if no gain envelope is active, this parameter has no effect.Max- scales theDelay Envelopeand is measured in seconds. This value represents the maximum possible delay and can range between 0 and 5. If no delay envelope is active this parameter has no effect.Feedback- scales the amount of feedback/echo in delay processing. Unlike others, this parameter has an effect even if noDelay Feedback Envelopeis active. Of course if noDelay Envelopeis active, then is has no effect.
To configure Hz.Spectre in soundscape scripts:
let acfg = {mode: "mono"};
let spectre = await scene.NewAnode("Hz.Spectre", {
  acfg,
  preset: {
    GainEnv: path.join(this.GetCWD(), "spectre/movingpeak.knt"),
    DelayEnv: null,
    DelayFBEnv: null,
    ZScale: 1,
    GainScale: 4,
    DelayMax: 2.0,
    DelayFB: .8,
    FFTSize: 2048,
    HopSize: 128
  }
});
Hz.SpectreCompress
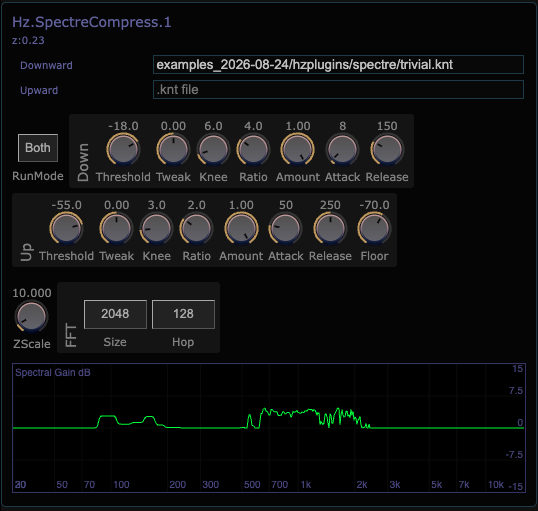
Hz.SpectreCompress is a spectral dynamics processor. Like Hz.DynaCompress,
it allows you to help prevent clipping and distortion. Unlike DynaCompress,
it operates in the spectral plane giving you control over compression within
each spectral band. But wait, there's more! Hz.SpectreCompress
supports compression and expansion on both the loud and quiet ends of
your spectrals dynamics. And if that's not enough, Hz.SpectreCompress supports
Envelopes and even time-varying Deep Envelopes allowing you to tune
the dynamics of individual spectral regions over time. This provides unusually
deep control over spectral dynamics.
Hz.SpectreCompress has a lot of parameters, but if you squint, they're mostly
duplicates because the processor works independently on both loud and quiet
spectral material. In addition to the parameter controls you can see a
Spectral Gain dB plot that provides live feedback on the amount
of gain applied per spectral bin. Values greater than 0 represent
expanding the signal range. Values less than 0 represent compression.
At the highest level, you select a RunMode: Down, Up, Both or Passthrough.
Next, you provide a Threshold and Knee that define the transition between
unaffected and processed spectral levels. You can tweak the Threshold with
the Tweak parameter and even specify a per-spectral-region curve via the
Downward and Upward envelopes. Attack and Decay control the
sensitivity to signal changes and Amount and Ratio control the amount
of the effect applied. Ratio controls how strongly spectral levels are
moved toward or away from the threshold. Values greater than 1 compress
the spectral dynamics; values below 1 expand them; 1:1 produces no change.
And this gives you combinations such as:
| DownRatio | UpRatio | Behavior |
|---|---|---|
| 4 | 4 | Compress peaks + compress lows |
| 4 | .5 | Compress peaks + expand lows |
| .5 | 4 | Expand peaks + compress lows |
| .5 | .5 | Expand both sides |
To instantiate in your scripts:
let compress = await scene.NewAnode("Hz.SpectreCompress", {
  acfg: {mode: "mono"},
  preset: {
    DownThreshold: -18,
    RunMode: 1, // 0:pass 1:compress, 2:expand, 3:both
    DownwardEnv: path.join(this.GetCWD(), "spectre/downenv.knt"),
    // UpwardEnv: path.join(this.GetCWD(), "spectre/upenv.knt"),
    ZScale: 10, // only relevant if a deep envelope is active
  }
});
spectrecompress.Show();
Envelope considerations:
- Edit/create envelopes with Envelope Editor.
- set
XMin,XMaxandXLogto select an interesting subregion of the spectrum. This is heavily dependent on your material. For spoken word, a range of[100, 8000]is usually more than sufficient. - set
YMin,YMaxto a range that represents the number of decibels (dB) around the associated threshold to attenuate. A range of[-4, 4]dB gives a lot of control and nuance. SincedBare already perceptual (ie Log)Hz.SpectreCompressignoresYLogand assumes the values are linear.
FFT considerations:
- FFT is a heavy computation so you should pick the smallest number that gives you sufficient spectral control. That said the default value of 2048 produces 1024 spectral bins. Which may be sufficient for most tasks. Performance is linear with the number of channels.
HopSize: controls the spectral sample rate. At a sample rate of 48000, 128 samples is approximately 3 milliseconds. This value overlaps with you choice forAttackandReleaseparameters
Hz.RetroVocoder
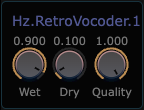
Hz.RetroVocoder is built atop Paul Kellett's 2008 Talkbox plugin.
Its simple interface belies the potential of really cool retro-robot
sounds. You must have two signal sources, typically a voice and and
instrument. These are wired as follows:
scene.Connect(voice, vocoder, 0, 0); // voice goes to vocoder port 0
scene.Connect(inst, vocoder, 0, 1); // instrument goes to vocoder port 1
Vocoder detects the incoming channel counts and reconfigures accordingly, Stereo operation is twice as expensive as mono.
Example here: hzplugins/retrovocder.js
Hz.Waveshaper
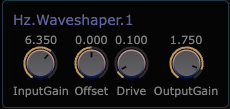
Hz.Waveshaper is a simple distortion effect built atop WebAudio's
WaveShaperNode.
Use the combination of InputDrive and Drive parameters
to select your distortion effect. Beside obvious distortion effects,
it is often used to add a warm feeling to a signal. Modulating Drive
is much more expensive than InputDrive since it updates the wave shaping
function.
Here`s an example:
let overdrive = await scene.NewAnode("Hz.Waveshaper",
            {preset:{InputGain:2, Drive:1, OutputGain:.5}});
Distortion example here: hzplugins/tuner.js (uses Hz.AudioIn).
Audio Utilities
Hz.AudioIn
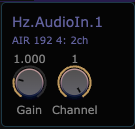
Hz.AudioIn connects your computer's default/current input device
into your soundscape or control script. When run, it attempts to
open your computer's audio input device (eg microphone). This
may require you to grant it permission.
warning WARNING if you wire your input directly to
Hz.DACyou may produce nasty feedback. This problem depends on whether your input device can "hear" your speakers.
If you have a USB audio interface it's possible to receive signals from other sources, eg guitar or fancy microphone. Such devices typically have headphone support to address the potential feedback problem.
Hz.AudioIn receives a mono mono signal. If your input device
has multiple channels, the Channel parameter can be specified
during anode construction as follows:
let audioIn = await scene.NewAnode("Hz.AudioIn", {preset:{Channel:1}});
Related nodes: Hz.Tuner, Hz.Recorder, Hz.WebAudioIn.
Examples here: hzplugins/audioin.js, hzplugins/tuner.js.
Hz.DAC (Output)
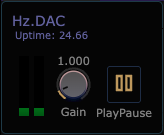
Most audio scenes include a Hz.DAC node because its the node that
delivers the results of the audio graph to your audio system's
output. For this reason, all roads lead to Hz.DAC.
Hz.DAC is one of the few singletons in the system. There is
no value in creating more than a single instance of it which is
why we provide ascene.GetDAC().
Hz.Blackhole
Hz.Blackhole is a utility node that you can use to ensure that
an anode, like Hz.Scope triggers without a connection to Hz.DAC.
It isn't a common requirement but when you need it, you need it.
As with Hz.DAC, Hz.Blackhole is a singleton and therefore
available via ascene.GetBlackhole().
There are no useful outputs of Hz.Blackhole, no use chaining them
to downstream nodes.
See example: hzplugins/blackhole.js.
Hz.Mix
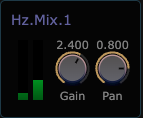
Hz.Mix is a simple mixing node that provides visual feedback on
the signal levels. It can be configured during instantiation
to either mixdown or preserve the input channels. When mixdown
is enabled, we provide Pan control. This is enabled during construction
like so:
let mix1 = await scene.NewAnode("Hz.Mix", {acfg:{mode:"mixdown"}});
See example: hzplugins/mix.js.
Hz.Scope
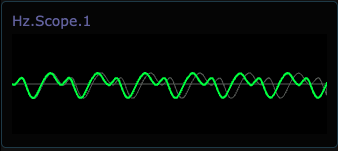
Hz.Scope is used to visualize the audio signal. Usually you use
it as a passthrough anode that intercepts, displays and forwards
the audio signal. It defaults to a stereo configuration but
you can request mono (depicted above) during construction like so:
let scope = await scene.NewAnode("Hz.Scope", {acfg: {mode:"mono"}});
There may be some cases where you don't want to forward the signal.
Unfortunately, unless the scope is ultimately connected to either Hz.DAC
or Hz.Blackhole the scope will not trigger.
Hz.SpectreScope
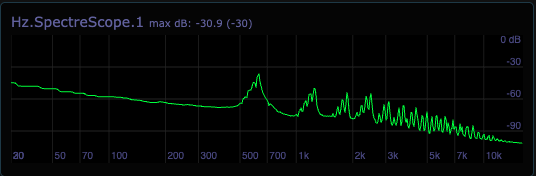
Hz.SpectreScope is used to visualize the frequency content of an audio signal.
As with Hz.Scope it must be chained to ultimately arrive at Hz.DAC or
Hz.Blackhole in order to trigger. The spectrum is computed from the
combined input channels. Note that both frequency (x) and amplitude (y)
axes are displayed on a logrithmic scale.
See example: hzplugins/spectreScopeTest.js.
Hz.Tuner
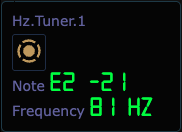
Hz.Tuner analyzes the primary pitch of its input signal and works well
for singal with strong tonal content like a guitar. Typically Hz.Tuner
receives mono input from Hz.AudioIn. As with most audio nodes its
output signal must be wired to a downstream node in order to trigger.
See example: hzplugins/tuner.js.
Hz.Recorder
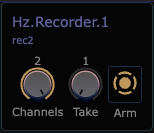
Hz.Recorder records its input signal to a .wav file and deposits
the result below your workspace directory HzWeb/_recordings.
Hz.Recorder supports two operating modes:
- interactive - you press gui buttons
Arm,Record,Pause,Disarm/Saveto modify the state of the recorder. When some material has been recorded and you pressDisarm/Save, the .wav file will written. If you forget to pressRecordno material will be recorded and no file will be saved. - preset - first your script requests
ArmviaLoadPreset. You can specify explicit start and stop times or as shown below yourrecordEndcan be "a long time away" and then your script can explicitly request a stop.
// start a recording
await recordNode.LoadPreset({
      ctrlMode: "Preset",
      prefix: "radio_" + ts,
      recordStart: 0,
      recordEnd: 1e10, // need to trigger end
  });

// later on stop it.
await recordNode.LoadPreset(
    {
      ctrlMode: "Preset",
      disarm: true, // <---- stop recording
      recordEnd: ascene.Now(),
    });
Interactive example: hzplugins/recorder.js.
Scripted example: algorithmic/radio/radio.js.
Hz.WebAudioIn (WebRadio)
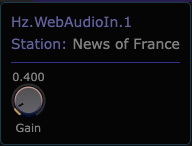
Hz.WebAudioIn is the Hz.AudioIn for the internet. You provide
a URL which streams a simple audio signal and it can appear in
your soundscape. Note that we currently support a subset of
potential audio src URLs. Also note that some website URLs
can be offline or become invalid. YMMV.
Here's how to construct:
let mystation = await state.ascene.NewAnode("Hz.WebAudioIn", {
                    preset: {
                      Station: name,
                      URL: url,
                      Gain: .2,
                    }});
See example: algorithmic/radio/radio.js.