![]()
/ Examples / Utility / Remapper
NoteStreams .. Instruments
Filters .. Effects .. LiCK Effects
Plot .. Utility .. Pure ChucK
Wherein we present the humble Remapper utility. Right-click to copy this example to your workspace
Remapper
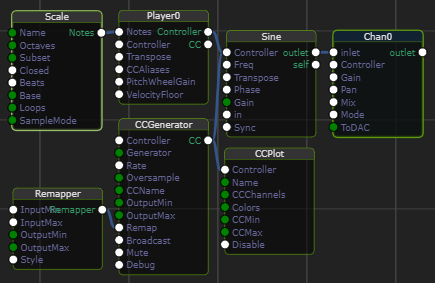
In this example's graph, remapper.chg, we focus on the Remapper node.
It is used in a variety of settings to convert incoming values in one
range into output values in another range. This same graph is employed
in another example where we focus on
the CCGenerator node.
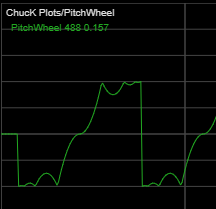
Here, the usual Notestream+Player+Instrument rig is being affected by
PitchWheel signals generated by CCGenerator. The generated signal is
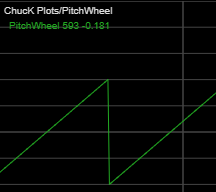
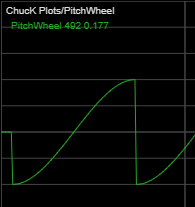
also routed through the CCPlot node to support your understanding
of this example. The images below were captured directly from
the Plot output.
Since CCGenerator produces signals
which range from -1 to 1, and since we want to control the amount of
pitch bending that occurs, we employ the Remapper node.
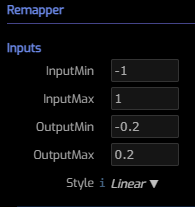
InputMin sets a minimum expected value in the input range.
InputMax sets a maximum expected value in the input range.
In this example, we know that CCGenerator produces values from -1 to 1. So these are the correct values for these parameters.
OutputMin sets a minimum value in the output range.
OutputMax sets a maximum value in the output range.
Here, since we know we're producing pitch bends, we opt for a 0-centered output range that modifies pitch by .2 of a semitone, or approximately 20 cents.
Style selects a means to connect the two output endpoints.
Linear draws a straight line between endpoints.
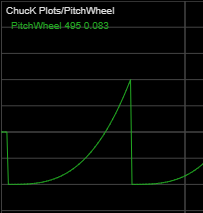
Exponential draws an exponential curve between endpoints. This is useful
when interpolating frequency or loudness as both are perceived logarithmically.
For this example, exponential is a poor choice since our output signal crosses
zero and exponential interpolation doesn't work in that case. Also, when
operating on frequency as MIDI note numbers, the note representation already
accounted for this fact about perception and thus can be interpolated
linearly.
Smooth Step is similar to Ease In Out (below), but more subtle. Here we
slowly leave the starting point, accelerates, then decelerates as
we approaches the endpoint.
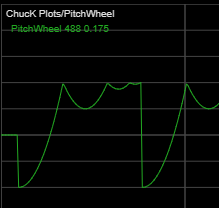
Ease In slowly leaves the starting point, accelerating to arrive at
the endpoint.
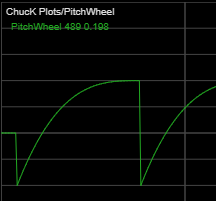
Ease Out accelerates immediately, then decelerates at the end.
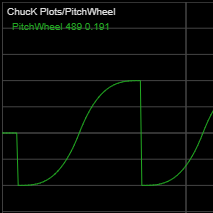
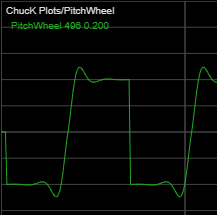
Ease In Out accelerates immediately and decelerates at the end. The
result is similar but more pronounced than Smooth Step (above).
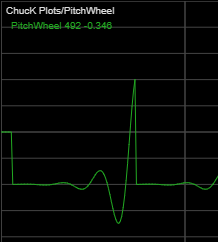
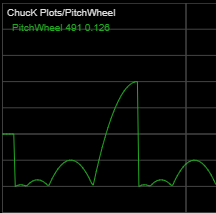
Ease In Elastic lingers around the starting point only to jump to the
endpoint after elasticizing. Note that this style can produce values outside
the endpoints.
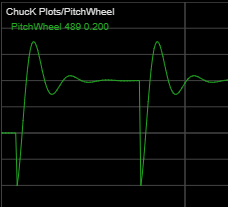
Ease Out Elastic rushes to the endpoint where it overshoots and
the settles on the endpoint. Note that this style can produce values
outside the endpoints.
Ease In Out Elastic combines the effects of In and Out with undershoots
and overshoots.
Ease In Bounce approximates the reverse effect of a bouncing ball.
Ease Out Bounce approximates the effect of a bouncing ball in inverted
gravity.
Ease In Out Bounce combines the effects of In and Out with floor and
ceilig bounces.